
Bookshelves are a great way to organize books for specific learning activities. Teachers and administrators can easily create, rename, and organize bookshelves to curate relevant resources, while students can also manage their own bookshelves and share them with teachers.
If you have a specific area that you would like to explore, use the links below to jump to that section:
Add customized resources to a bookshelf
Access My Bookshelves
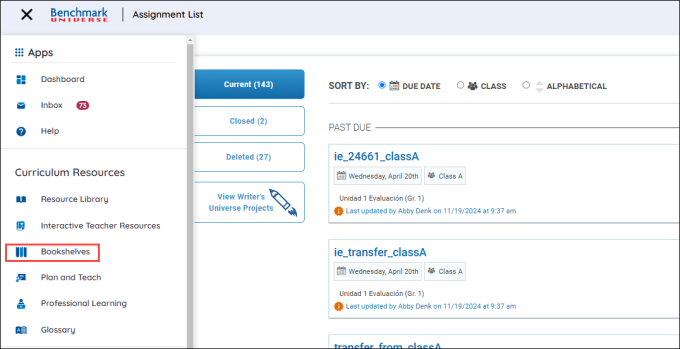
Access the Bookshelves through the Bookshelves button in the Menu.
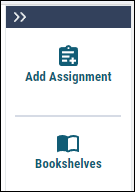
You can also access the bookshelves by using the Bookshelves button under Add Assignment button in the Resource Library.
Create Bookshelves
You can create a new bookshelf on the Bookshelves page by following the steps below:
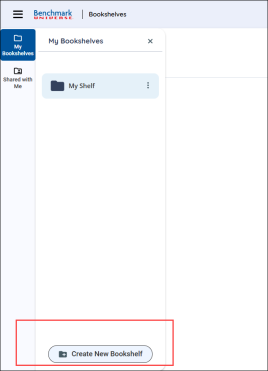
- Click the Create New Bookshelf button.
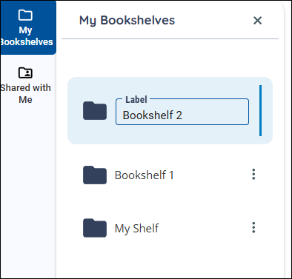
- Type the name of the bookshelf in the text box below.
- The Bookshelf appears in the My Bookshelves list.

|
Bookshelf blocks are listed in alphabetical order. |

|
Drag a resource to the Bookshelves icon to add it to an existing bookshelf or create a new bookshelf to add it to. |
Add resources to a bookshelf
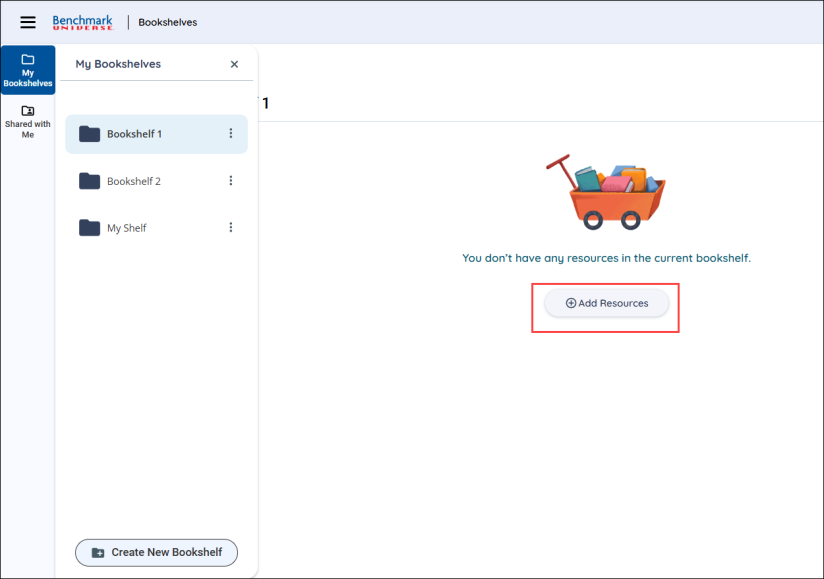
Add resources by selecting the Add Resources button in the My Bookshelves page or by using the Resource Options modal.

- Find the resource you want to add to the bookshelf.
- Click the More Options icon on the resource thumbnail. The Resource Options modal appears.
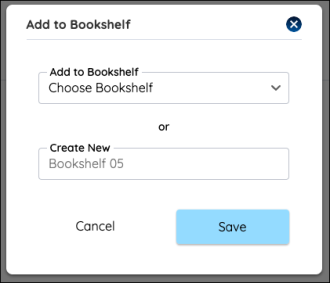
- Click Add to Bookshelf.
- Select a bookshelf from the dropdown and select the Save button to add your book. If you’d like to create a new bookshelf and add your book to it, just select Save and your book will be added to a new bookshelf with a default name. If you want to name the new bookshelf, type the name in the text field.
|
|
You can also drag and drop a resource to add it to a bookshelf. You can also select more than one resource at a time by selecting the check mark at the top left of the thumbnail. |
Edit a bookshelf
You can change a bookshelf name, remove resources, or delete bookshelves by going to the Bookshelves page and clicking on the icon in the bookshelf next to its title.
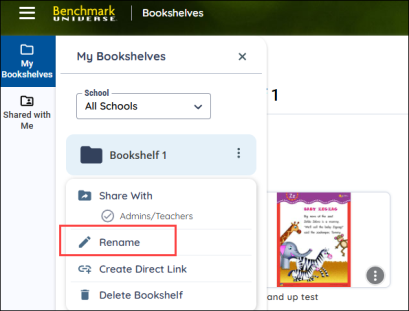
Edit a bookshelf name
- Find a bookshelf and click the More Options icon.
- Click the Rename icon and change the bookshelf name in the text box.
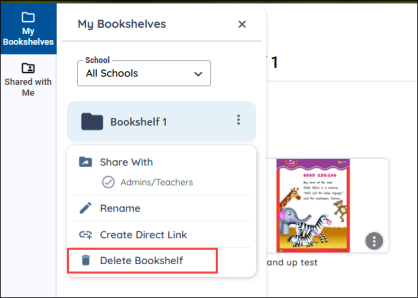
Delete a bookshelf
- Find a bookshelf and click the More Options icon.
- Ensure you have selected the correct bookshelf before deleting.
- Click Delete Bookshelf below the bookshelf name.
|
|
Deleted bookshelves cannot be restored. |
Remove resources from a bookshelf
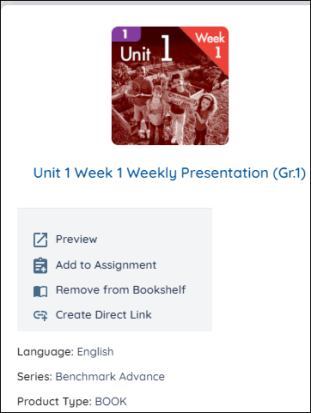
- Find a resource on your bookshelf.
- Click the More Options icon on a book. The Resource Options modal appears.
- Click Remove from Bookshelf from the menu below the title. Note that if you are trying to remove a customization from a bookshelf, the Remove from Bookshelf option will be under the Customization resource title on the right.
Add customized resources to a bookshelf
You can add customized resources to a bookshelf from the Resource Options modal by using the Add to Bookshelf button.
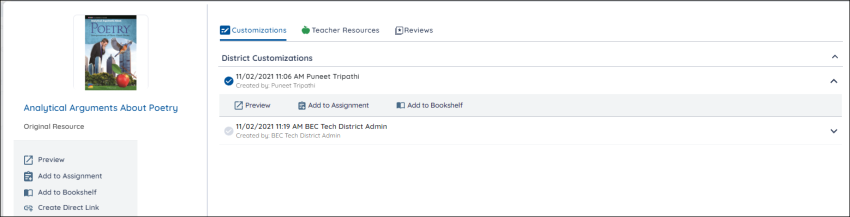
Note: These instructions only apply to customized books.
- Find the customized book you want and press the More Options icon.
- Select a customization from the Customizations list in the Resource Options modal.
- Click Add to Bookshelf.
- Select a bookshelf from the dropdown and select the Save button to add your book. The first two options in the dropdown allow you to add your Customization to the School or District Customization shared bookshelves. If you’d like to create a new bookshelf and add your book to it, just select Save and your book will be added to a new bookshelf with a default name. If you want to name the new bookshelf, type the name in the text field.
|
|
You can also drag your customized resources to a bookshelf instead of using the menu. You must choose the customized version of the resource you want to add to the bookshelf before you drag. You can also select more than one resource at a time by selecting the check mark at the top left of the thumbnail. |
Last Updated: February 05, 2025